Butter Sponge Cake
Ingrediants
2 eggs
dash salt
1 cup sugar
1 tsp vanilla
1/2 cup milk
1 Tbsp butter
1 cup sifted flour
1 tsp baking powder
1 Tbsp grated orange rind
3 Tbsp sugar
Beat eggs until very light, beat in salt, sugar, and vanilla. Heat milk and butter to boiling point (I do so in the microwave till it starts to bubble). Add to first mixture. Sift in flour and baking powder... blend in. Bake in greased 8 inch square pan at 350F for 25-30 minutes (less if doing cupcakes). When done sprinkle top with orange rind and 3 Tbsp sugar. Turn off heat and return to oven for 5 minutes (I don't usually bother with the orange rind and sugar at the end).
Never Fail Chocolate Cake
Ingrediants
2 Tbsp butter melted with
5 Tbsp cocoa
1 cup white sugar
1 cup flour
1 1/2 tsp baking powder
1/2 tsp baking soda
pinch salt
1 tsp vanilla
Break one egg into measuring cup and fill with milk (1 cup). Sift dry ingredients. Add milk and egg, then butter/cocoa mixture. Mix well. Bake in 8 inch square pan in 350F oven for 30 minutes.
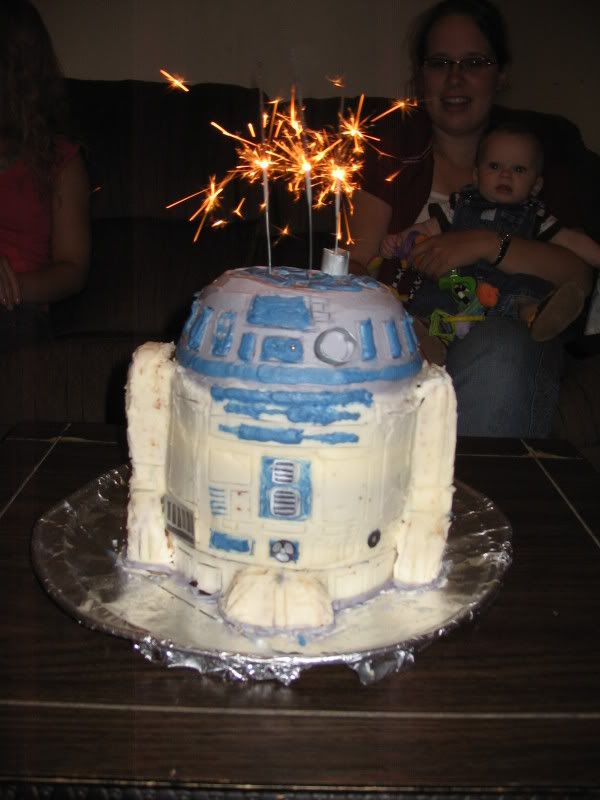
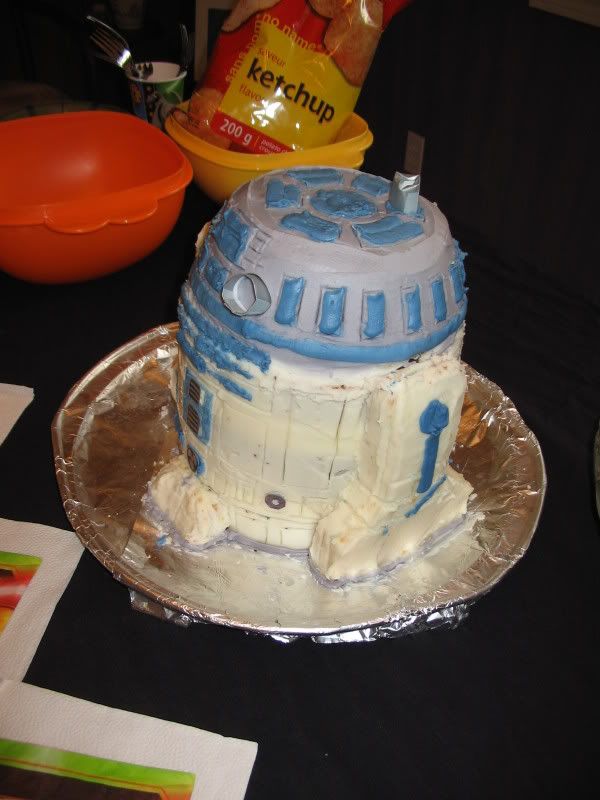
To Make R2 D2 cake
 Make 3 batches of butter sponge. Bake in the following size pans: 2x 6 or 7 inch round pans and one 8 inch square pan. Make 2 batches Never Fail Chocolate. Bake in one 6 or 7 inch round pan and one bowl or half round pan that is the same size as the rounds.
Once cakes are baked, layer one white and one chocolate round layer. Place wood dowels or shishcabob picks into the cake and place a cardboard layer on top (cut a bit smaller than the cake and covered in tinfoil. Spray before putting on). Then put the last white layer and the chocolate bowl cake on top to make a dome. Cut the legs of R2 out of the square. Also cut a small triangular piece for the front of R2.
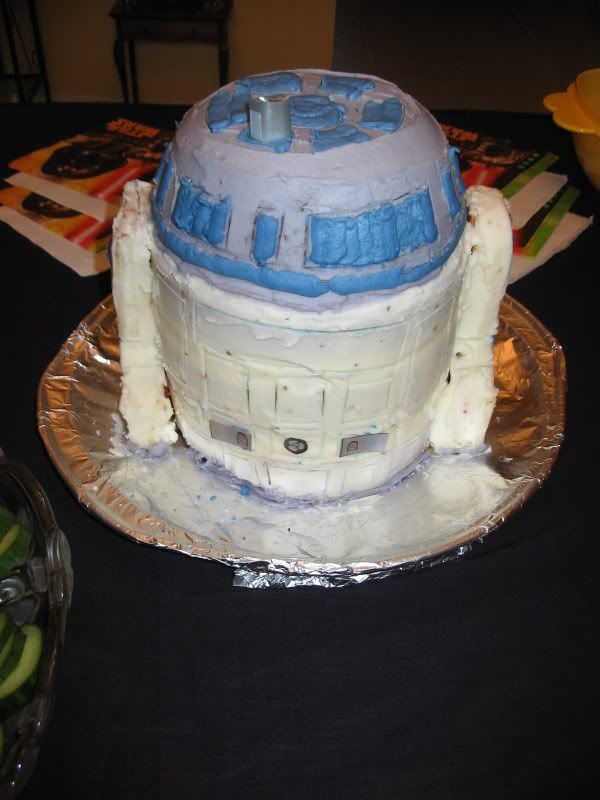 Ice the dome portion of the cake using your fave icing (I made butter icing using 1/4 cup softened butter, 4 1/2 cups icing sugar mixed into it, add 1 tsp vanilla and then add milk until spreading consistancy, about 3 Tbsp). Keep it white and just cover the round cake layers (not the "dome") with the icing for now. Add the legs to the cake using toothpicks to "fasten" into place. Also add the triangle piece. Cover these pieces with white icing. Add enough black coloring to the remaining icing to make a silvery grey color. Cover the dome. Pipe this icing (thinning if necessary) to the bottom of the cake. Make more icing if necessary and add enough blue coloring to make bright blue icing. Ice the blue sections around the head, the top, the back, and the legs. I used a toothpick to "cut" the pattern of panels and such into the current icing on the cake. This adds a 3D effect. Fill those panels that need to be blue.
 Once done that, out of silver paper make the vents, fans, and the lights on top of R2 D2's head and use icing to fasten the "flat" pieces. The lights can just be "plugged" into it. If you have black shoestring licorice (I do not) use them as the wires on the legs. It's easier to decorate the cake if you have a pic of the unit in front of you.
There you have it. One R2 D2 ready to eat.
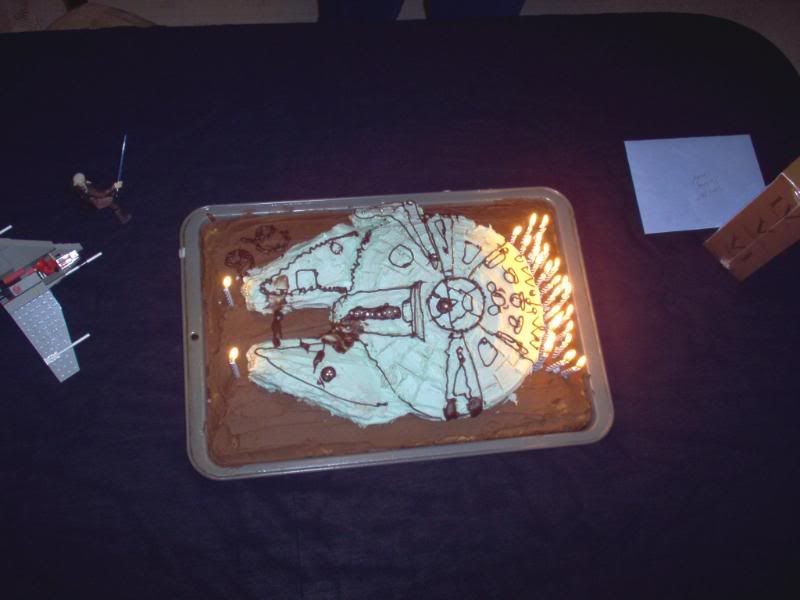
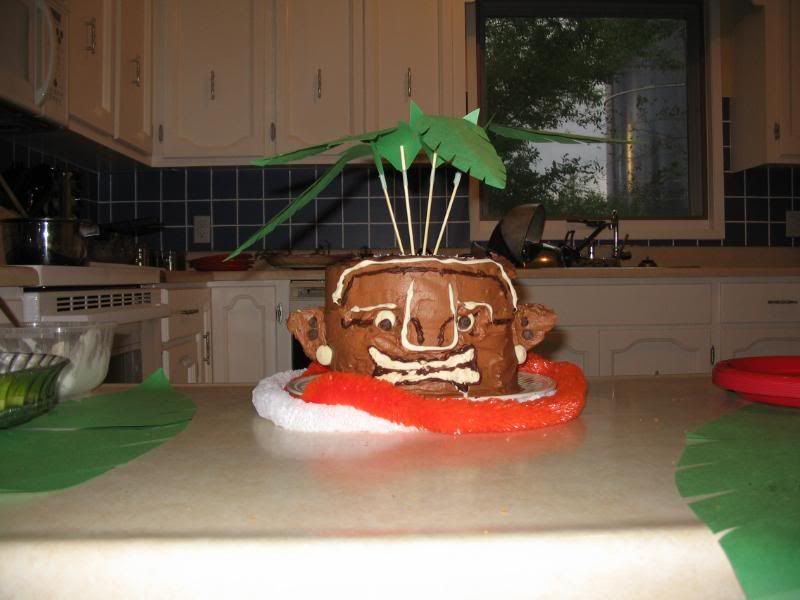
Here are two other cakes I made using these recipes. Enjoy, and have fun baking.


1 comment:
OMG- that is the coolest cake I have ever seen! You are talented- my 10 year old would kill for an R2D2 cake!
Post a Comment